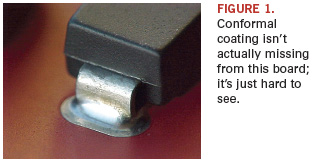
The ‘Missing’ Conformal Coating
Parylene coating is tough to see under UV light.
This month we feature an issue recently submitted to the database. It purports to be missing conformal coating, but is it?
Actually, this is a satisfactory board assembly after coating. This board assembly has a Parylene coating, which is around 15 µm in thickness on all surfaces of the board and components. Based on the process, coverage and thickness is virtually guaranteed. It is difficult to see the coating due to the process and the type of material used, so it’s not a defect. Most conformal coatings are fairly easy to inspect visually with UV light; however, one of the best coatings in terms of performance is difficult to see. This coating is more expensive than most, and the process is normally subcontracted.
It is sometimes possible to see the coating under higher magnification on the side of the components close to the board surface, normally when a thicker coating has been applied. Inspection also can be easier if a QC label is placed on the surface of the board prior to coating, or if it’s possible to compare the solder mask surface with and without coating.
These are typical defects shown in the National Physical Laboratory’s interactive assembly and soldering defects database. The database (http://defectsdatabase.npl.co.uk, available to all this publication’s readers, allows engineers to search and view countless defects and solutions, or to submit defects online.
Dr. Davide Di Maio is with the National Physical Laboratory Industry and Innovation division (npl.co.uk); defectsdatabase@npl.co.uk. His column appears monthly.


